14. Testing AUTOSAR Components#
Reactis for C includes an AUTOSAR Import Wizard, which automates the process of preparing Classic AUTOSAR C code for testing.
Given an AUTOSAR component,
the wizard uses the AUTOSAR model of the component (defined in .arxml files) to generate
the files needed to build the C code of the component and to test the C function for each runnable.
Furthermore, for an AUTOSAR component generated from a Simulink model,
the Simulink code mappings (defined in the model) can be used to make
the C harness of each runnable match the corresponding model harness created in Reactis for Simulink.
Automatic generation a C harness that matches a model harness enables immediate back-to-back testing of
model and code because test suites can be shared between Reactis for C and Reactis for Simulink.
The basic steps in the AUTOSAR Import Wizard are as follows:
Specify one or more
.arxmlfiles.Select the AUTOSAR component to test.
Amend or extend the initial mapping from engineering objects to source files.
Select the runnable to test.
Optionally, select a model harness in a Reactis info (
.rsi) file that the C harness should match.Generate files, with the option to overwrite or extend existing Reactis files.
The AUTOSAR Import Wizard produces the following output files for the selected component and runnable:
A set of C and H files that implement a minimal RTE for the component.
A Reactis make (
.rsm) file that is configured to build the RTE and the component.A Reactis harness (
.rsh) file that contains a harness for testing the runnable.
These steps are covered in detail in the rest of this chapter.
14.1. AUTOSAR subset#
Currently, the AUTOSAR import supports the following AUTOSAR features:
single-instance atomic software components;
ports with sender-receiver interfaces;
runnables triggered by (periodic) timing events;
inter-runnable variables;
calibration using shared parameters or constant memory parameters.
The AUTOSAR model is required to have variants bound.
14.2. Starting the Wizard#
If the C harnesses for runnables should match model harnesses, Reactis for Simulink should be used to create the required model harnesses before starting the wizard. To do this, open the model in Reactis for Simulink and create a harness on the Subsystem block for each runnable, using the sample period of the runnable for the harness sample period. For further information about harnesses, see the Reactis for Simulink User’s Guide.
To start the wizard, select File > Import AUTOSAR Specification…. This will open the wizard, as shown in Figure 14.1.
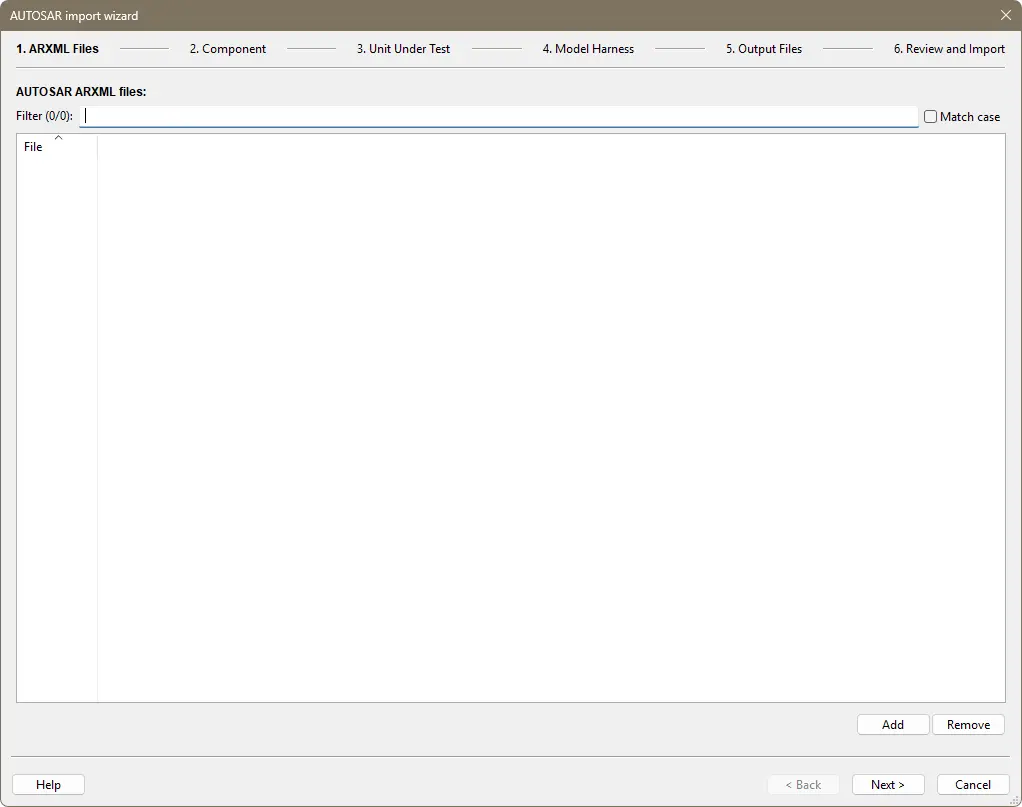
Fig. 14.1 The AUTOSAR Import Wizard#
14.3. Select ARXML Files#
The first step is the selection of .arxml files.
All relevant .arxml files are required. These files can be added by clicking on the Add button,
and removed by clicking on the Remove button. These buttons are located in the lower right corner.
Once all .arxml files have been added, click on the Next button to proceed to the second step.
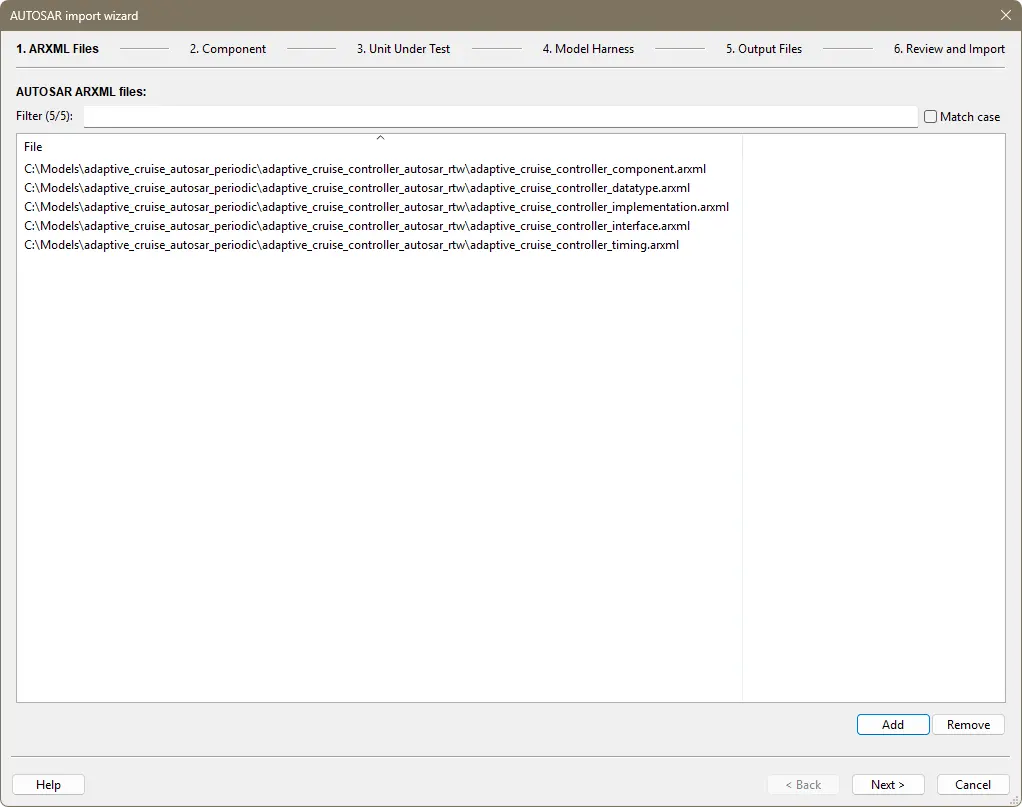
Fig. 14.2 The AUTOSAR Import Wizard after .arxml files have been selected.#
14.4. Select Component#
The second step is the selection of the component to test. The wizard will read the .arxml files and
provide a list of available components, as shown in Figure 14.3.
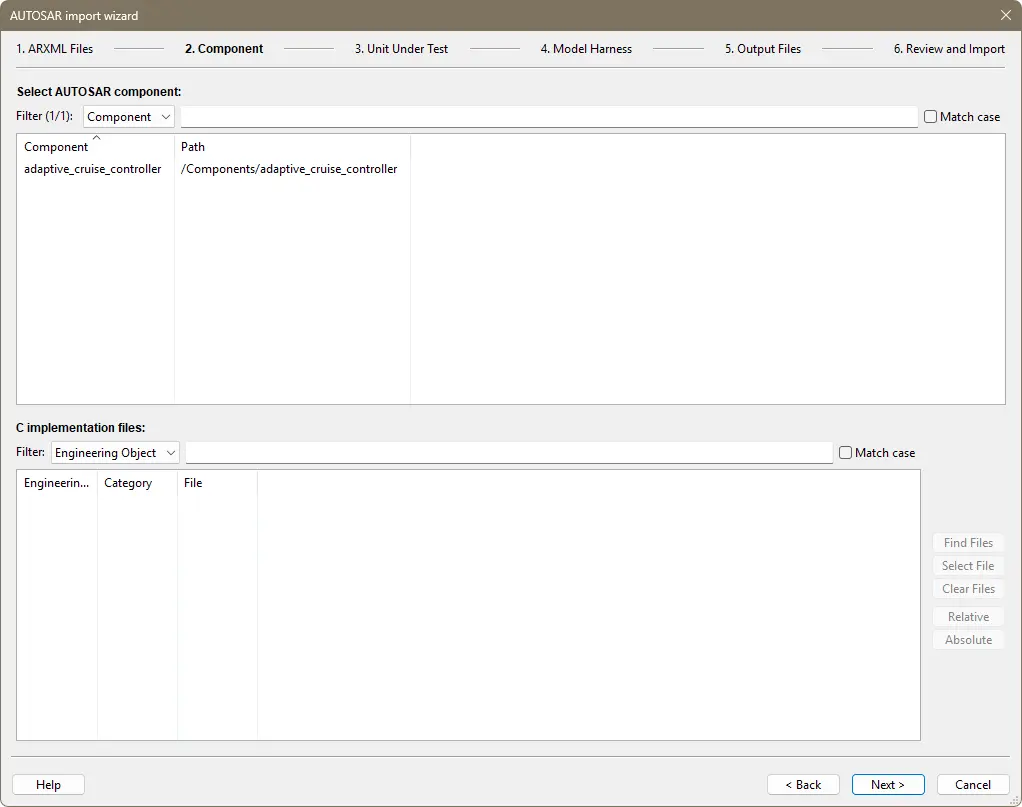
Fig. 14.3 The AUTOSAR Import Wizard listing available components.#
A component is selected by clicking on it. When the component is selected, the source files needed to build the selected component will be listed underneath the list of components. The source files are listed in a table with three columns:
Engineering Object An AUTOSAR engineering object.
Category The AUTOSAR category for the engineering object.
File The pathname of the source file which was generated for the engineering object.
The wizard will automatically determine the source file for as many objects as possible using
a heuristic based on the engineering object name. However,
in some cases it will be unable to find the source file, in which case the File column will be
empty. If you plan to reuse the .rsm and source files from a previous build, you can safely ignore
objects which do not have a corresponding file. Otherwise, you will need to specify the location
of each object with an empty File column.
To specify the location of a source file, first select the object by clicking on it. Note that you can use shift-click and control-click to select multiple objects. Once you are satisfied with your selection, click on either the Select File button (for a single file), or the Find Files button (for one or more files).
The Select File button will open a dialog which you can use to select a C or H file.
The Find Files button will open a dialog which lets you select a directory. The wizard will search the directory and all subdirectories for source files for the selected objects using a heuristic based on the engineering object name.
Once the File column is complete for each object, the result should be similar to Figure 14.4.
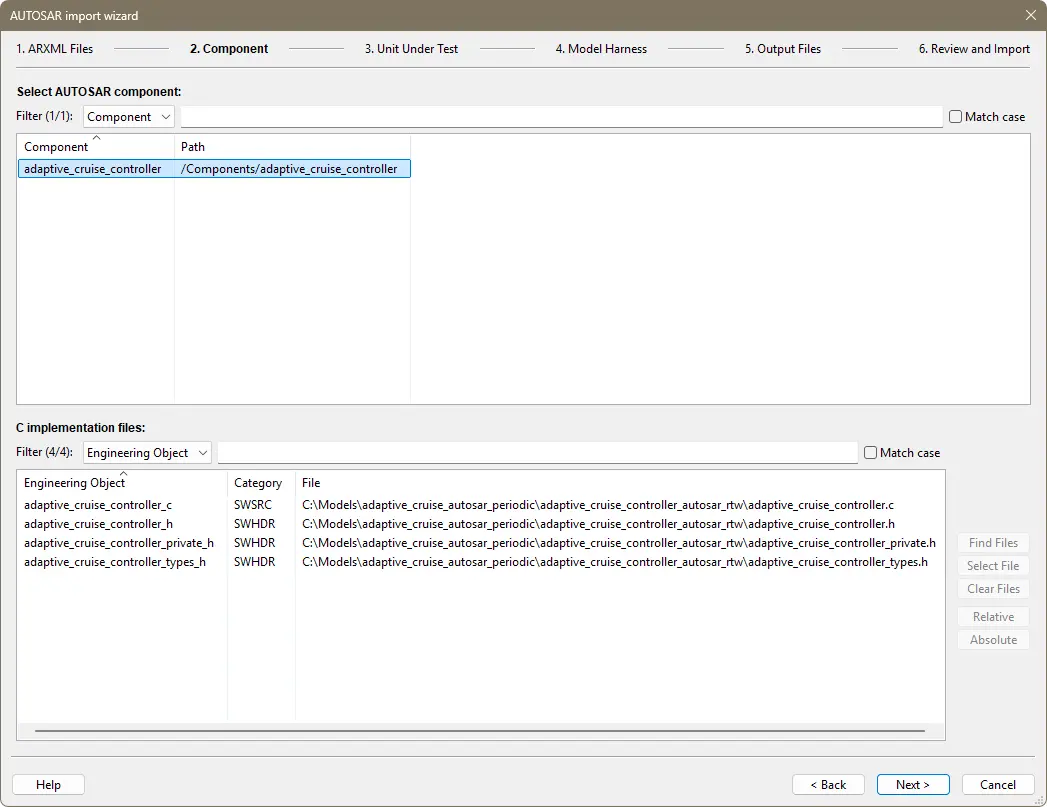
Fig. 14.4 The AUTOSAR Import Wizard after a component and all files have been selected.#
Click on the Next button to proceed to the third step.
14.5. Select Unit Under Test#
In the third step, the wizard will list all available runnables for the component which was selected in step two, as shown in Figure 14.5.

Fig. 14.5 The AUTOSAR Import Wizard showing available runnables within the selected component.#
Select the runnable you want to test by clicking on it, and then click on the Next button to proceed to the next step.
14.6. Match Model Harness#
The fourth step of the wizard is the optional selection of a Reactis info (.rsi) file that contains the model harness to be matched.
If selected, the model harness determines the names and RSI types of the inputs, outputs and configuration variables in the C harness.
If no .rsi file is selected, the names will be based on the C variable names and the RSI types will be based on the C types.
To select a .rsi file, click on the checkbox Match C Harness to Model Harness.
This will open a dialog which you use to select the .rsi file.
Once the .rsi file
has been selected, a list of available model harnesses will be shown.
An example of this
is shown in Figure 14.6.
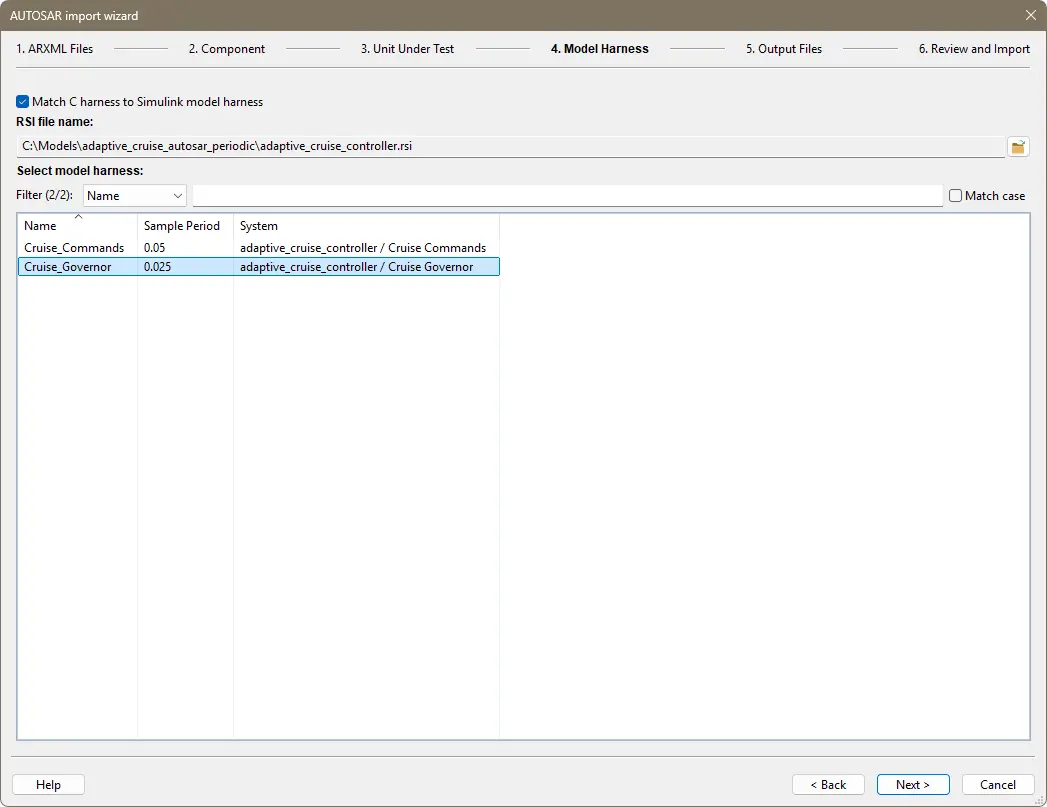
Fig. 14.6 The AUTOSAR Import Wizard displaying available harnesses within the selected .rsi file.#
Click on the model harness you want to match, and the click on the Next button.
14.7. Select Output Files#
In the fifth step, the wizard lists the output files that will be generated, and indicates whether there is already a file from a previous testing session. An example of this is shown in Figure 14.7.
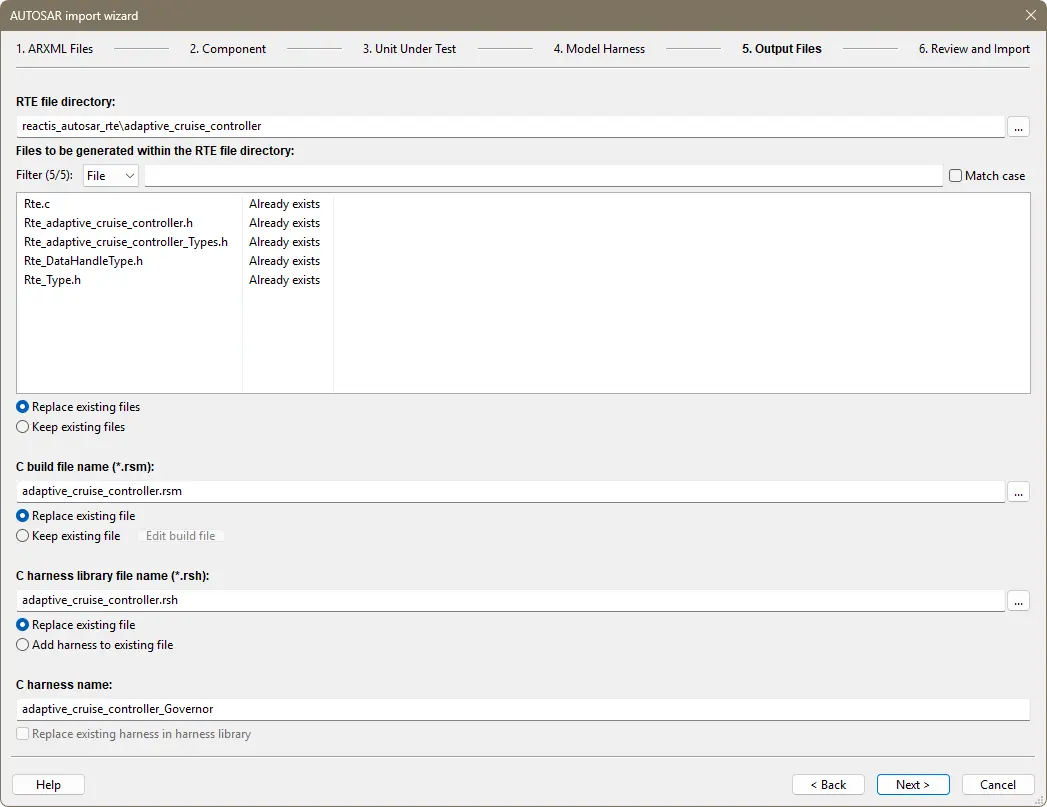
Fig. 14.7 The AUTOSAR Import Wizard showing output files which will be generated.#
In this step you can change the following:
The directory in which the RTE source files will be placed.
The pathname of the
.rsmfile.The pathname of the
.rshfile.The name of the C harness in the
.rshFile.
In addition, there are radio buttons that let you keep or overwrite the RTE source files,
.rsm file, and .rsh file. When keeping an existing .rsh file, you can also choose to replace an
existing harness that has the same name as the harness to be generated by the wizard.
When you are satisfied with you selections, click on the Next button.
14.8. Review and Import#
In the sixth and final step of the wizard, a summary of the actions the wizard will perform is listed. An example summary is shown in Figure 14.8. If the everything is correct, then click on the Import button, to create all files and compile the C code. If something is wrong, you can use the Back button to return to previous steps of the wizard and make changes.
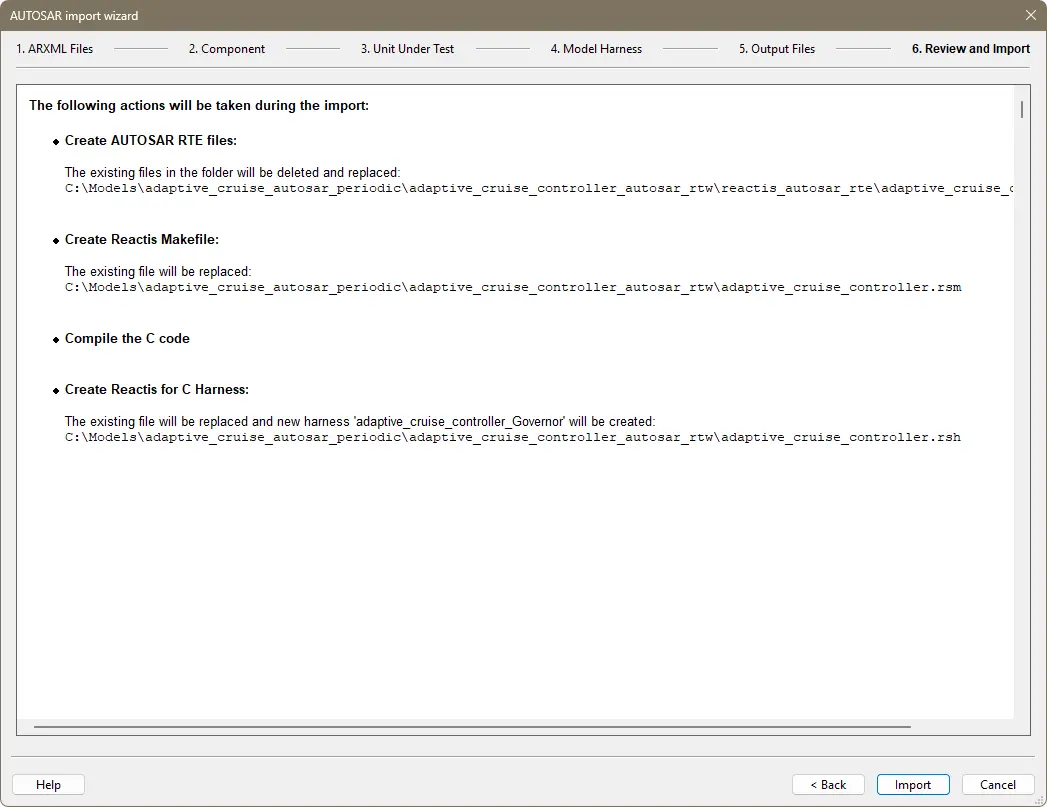
Fig. 14.8 The AUTOSAR Import Wizard showing a summary of actions that it will perform.#
When you click on the Import button, the wizard will perform the listed actions in the order given. Beneath each action, a Success or Failure status will appear, with links to warning or error messages that were produced during the action.
If the import was successful, you can click on the Close button to exit the wizard. This will return you to the main Reactis window with the imported code loaded and ready to test.
If there were errors, you use the Back button to correct any mistakes that were made during earlier steps.
14.9. Fixing Errors#
During the second and subsequent steps of the wizard, you can always click on the Back button to navigate to the previous step, if there is a change you want to make. You can use both the Next and Back buttons as many times as needed.